Second Grade Art Lesson 20
Heart Prints, Part 1
Objective:
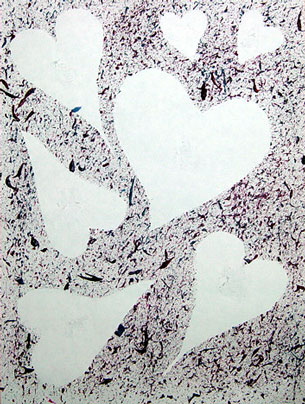
The students will cut out several heart shapes, plan a composition using the heart shapes, and then spatter paint on the background as is the basic technique of silk screening.
Materials:
Scrap construction paper to cut the heart shapes from, 9 x 12 white paper, scissors, acrylic or tempera paint, old toothbrushes, small rectangular pieces of cardboard, newspaper
Procedure:
Begin by introducing the students to the heart shape. Show how it can be long and thin or large and round or with one side larger than the other. Encourage them to consider the many variations they could make to draw their hearts, and then have them cut out either five or seven heart shapes. Spread the newspapers to cover the tables and distribute a sheet of white paper to each student. Next, talk about composition; the way the shapes are arranged on the paper. Have them place their heart shapes onto the white paper and play around with them until they find the most interesting composition. When they are sure of the best arrangement, demonstrate how we are going to splatter paint on the paper. Mention that this process is similar to how silk screen printing is done. Shapes are created and put on fabrics or other printable surfaces. Then ink is pulled across a screen, coating the uncovered area with color. Layers of stenciled are arranged to be removed as the ink colors are changed out. We will begin by putting paint onto the toothbrush, then holding it over the paper, pull the bristles of the toothbrush across the edge of a sturdy piece of cardboard causing the paint to splatter onto the paper. Repeat the process many times until the entire surface has a relatively thick coat of paint. Feel free to mix some colors to get a more colorful final affect, but remember that if you mix all three primary colors the finished product will be a dreary looking brown. When the surface is filled with enough paint, put them in a safe place to dry until next lesson.
Conclusion:
Review the terms composition and silk screen with the students. If you have fabrics, shirts or other examples of things that have been silk screened be sure and share them. Examples can be found on the links to our website. Have the children rinse the paint out of the toothbrushes and clean up their area.
Artwork and Examples used in this lesson

Teachers Example


