


Kindergarten Art Lesson 3
Introduction to the Art Element Shape, Part 1 Making Shapes with Lines
Objective:
The student will practice cutting skills by using scissors to cut lines which they will use to weave together to create “shapes”.
Materials:
scissors, glue sticks, a black fine tip marker (or Sharpie) 2, 3" x 6' construction paper, one red and one blue, one 6" x 6" yellow construction paper with strips cut for weaving
Procedure:
Begin by reminding the students of the previous lessons that introduce the art element line. Explain that we will learn about another art element, shape, by using lines. A shape is an area enclosed by a line. Have the students name some shapes they are familiar with (triangle, square, circle and rectangle). Next, introduce weaving by explaining that the fabric of our clothing is woven as are many other things we use daily. Have the children take the red and blue papers and cut lines from them. Do not encourage them to draw the lines off, simply have them cut from the bottom to the top. Each child will need a total of five to seven lines (depending on how wide they cut them). Next have the class make a fist with their right hand and hold their left hand out in front of them. Tell them to put their fist over their left hand. Then have them put their fist under their hand. Repeat this several times to help them understand over and under. Explain that we will use the lines we cut to go over and under the precut lines on the yellow paper. Demonstrate the weaving process.(Point out how the lines change appearance to shapes!) Have them use their glue sticks to tack down the beginning and end of each line before the go on to weave the next line. Many of the children will have a hard time alternating their weaving rows and will end up having all lines going over and under the same yellow strips. Do not discourage them, simply show them how to alternate each line. Some will do it and others will not be able to. Once they have all of their lines woven have them put it down and look to see if they see any shapes. They should all begin to recognize the red and blue squares and rectangles that were formed by weaving. If they were successful in alternating rows, they will also see the yellow shapes. Have them focus on the shapes by using the black fine tip marker to draw shapes onto each of the different shapes in their weaving. This assessment will indicate those who can recognize shapes and those who do not.
Conclusion:
Review the difference between line and shape. Discuss the words “shape” and “weaving”. Allow the children to enjoy looking at each others art work. Mount the weavings on a piece of black construction paper and hang them for everyone to enjoy.
Artwork and Examples used in this lesson
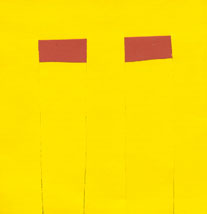
Cut pattern for paper
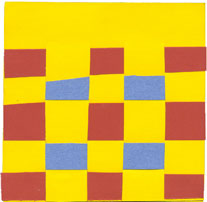
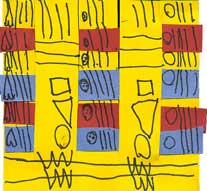
Assembled weave example
Student artwork
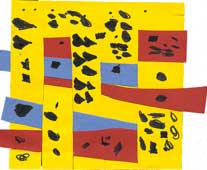
Student artwork


Arttango © All Rights Reserved 2013. All logos and images used on this site are the property of the rightful owner