


First Grade Art Lesson 7
Weaving Mats, Part 1 American Indian Studies
Objective:
The student will weave paper to create a mat.
Materials:
Precut 12 x 18 inch papers into one inch strips, but do not cut all the way through. Leave one inch uncut at the end. Also precut 12 x 18 inch papers into one inch strips in a variety of colors and white. Tape
Procedure:
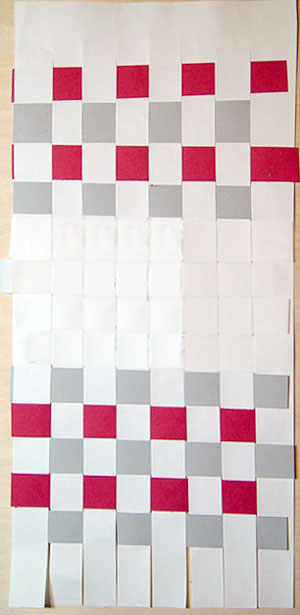
You may be looking at Indian cultures in your class. We are going to look at one process the Indians are very famous for. That would be weaving. Does anyone know what weaving is? Many things in your world have been woven. Your clothes for example. The fabric of your clothing was woven before it could be cut and sewed together. Can you think of anything else that was woven? We are going to weave a mat. While most Indians wove with yarns, threads, and even natural materials such as reeds and barks, we are going to weave with paper. Weaving is fairly simple when you understand some basic concepts. First you must go over, then under, over, then under as you weave across. Second each row of weaving must alternate. So let's begin. Select some colors that you would like to weave into your mat. We will call these strips weavers. Beginning with the first strip, weave over, then under, over, then under until you go all the way across your mat. With the next weaver, you will follow the same procedure, only when you went under before, you will go over now, and vice and versa. Continue down a third of the way using colors. For the center area of your mat, use white weavers only. This is where we will paint an Indian symbol in our next lesson. Make sure each weaver is right next to the one before it. Once you have a large central in white, complete your mat with colored weavers. Using clear tape, stretch a piece along each edge to anchor the weavers. This will be the back of your mat.
Conclusion:
Spend time this week looking for things that have been woven. You may look for baskets, rugs, or pocketbooks.
Artwork and Examples used in this lesson
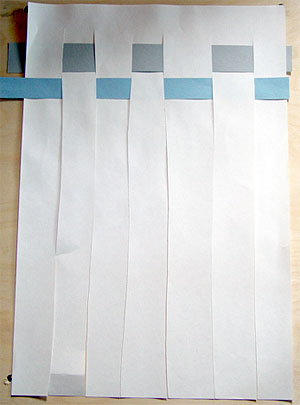
Paper Weaving in Progress
Teachers Weaving Example

Navajo Twill Weaving


Arttango © All Rights Reserved 2013. All logos and images used on this site are the property of the rightful owner